
dave spink toolset
|
|
dave spink toolset |
|
|
SAN TASKS: |
|||
| BACKUP | RESTORE | HEALTH | NAME SERVER |
| SWITCH SHOW | ZONES | SYSLOG | DEPLOY |
| SNMP CONFIG | CTP FAILOVER | SWITCH LOGS | NTP |
| BASIC INFO | COMMANDS | ||
BACKUPBrocade Logon to brocade switch. # ssh 10.140.128.37 Trying 10.140.128.37... Connected to 10.140.128.37. Escape character is '^]'. Fabric OS (tm) Release v2.6.0f login: admin password: adminXXX Execute the configUpload command. FC_Switch:admin> configUpload Server Name or IP Address [host]: d1de0199 User Name [user]: spi0004 File Name [config.txt]: swA_TAMPAconfig.txt Protocol (RSHD or FTP) [rshd]: ftp Password: test12 upload complete Switch Information Report - contains ISL, port details, name server, and zoning information. http://10.140.128.37 select admin view button with a key / filing cabinet enter user name and password select switch information report save the .html RESTOREBrocade # switchdisable # configdownload ***get backup copy # switchenable HEALTHBrocade # supportShow See extract from support view file:
      frames    enc  crc  too  too  bad  enc disc link loss loss frjt fbsy
      tx   rx   in   err shrt long  eof  out   c3 fail sync  sig
    ---------------------------------------------------------------------
 0:  2.1g 1.1g   0    0    0    0    0   54    0    3   29    3    0    0

 1:  289m 217m   0    0    0    0    0   12    0    4    6    1    0    0

 2:   17m 2.3m   1    1    0    0    1  293    0    8   54    2    0    0

 3:  4.2g 948m   2    2    0    0    2  195    0    0  158    3    0    0

 4:  3.5g 1.1g   0    0    0    0    0   57    0    0   59   20    0    0

 5:  2.3g 2.0g   2    1    0    0    1  1.4k   0   39   31    3    0    0

 6:  110m  71m   0    0    0    0    0   11    0    1    6    1    0    0

 7:  4.0g 3.2g   0    0    0    0    0  6.5k   0    0  6.6k   5    0    0

 8:  1.7g 2.9g   1    1    1    0    1   70    0    5   85   51    0    0
The link fail message indicates a problem with this HBA. The loss sync indicates a possible cable problem, however, note the 6000 loss of sync messages is spread over 4GB of transferred files. Typically anything more than a 4:1 ratio indicates a problem. NAME SERVERBrocade The command "nsShow" or "nsAliasShow" displays the name server table. The nice feature of "nsAliasShow" as the name suggests is the alias information.
FC_Switch_A:admin> nsAliasShow

Type Pid    COS     PortName                NodeName                 TTL(sec)
N    021000;    2,3;20:00:00:e0:69:41:44:e8;10:00:00:e0:69:41:44:e8; na
    FC4s: FCIP
    Fabric Port Name: 20:00:00:60:69:40:17:8b
    Aliases: d1pr0001_0

N    021800;      3;20:02:00:60:45:17:45:f3;10:00:00:60:45:17:45:f3; na
    FC4s: FCP [ADIC    Pathlight 5000  42dG]
    Fabric Port Name: 20:08:00:60:69:40:17:8b
    Aliases: snc_tlu_A0

N    021b00;    2,3;50:06:04:82:bf:d1:4e:02;50:06:04:82:bf:d1:4e:02; na
    FC4s: FCP [EMC     SYMMETRIX       5567]
    Fabric Port Name: 20:0b:00:60:69:40:17:8b
    Aliases: symm1560_3A
SWITCH SHOWBrocade FC_Switch_A:admin> switchShow switchName: FC_Switch_A switchType: 6.1 switchState: Online switchMode: Native switchRole: Principal switchDomain: 2 switchId: fffc02 switchWwn: 10:00:00:60:69:40:17:8b switchBeacon: OFF Zoning: ON (CPSHIP_SW1) port 0: id Online F-Port 20:00:00:e0:69:41:44:e8 port 1: id Online F-Port 20:00:00:e0:69:41:44:fb port 2: id Online F-Port 20:00:00:e0:69:41:45:15 port 3: id Online F-Port 20:00:00:e0:69:41:45:25 port 4: id Online F-Port 20:00:00:e0:69:41:4a:0e ZONESBrocade Create and display a host alias. aliCreate "d1de0003", "20:00:00:01:73:00:9e:9f" aliShow Create and display a zone. zoneCreate "my_zone", "d1de0003; d1pr0005_0" zoneShow "my_zone" Add zone to existing config, or create a configuration file if needed. cfgAdd "prod_cfg", "my_zone" cfgCreate "prod_cfg", "my_zone" See the active zone configuration. cfgShow Enable and save the configuration. cfgEnable "prod_cfg" cfgSave Cisco Create zone on vsan 100. config t fcalias name UXNBPR101_1 vsan 6 member pwwn 20:07:00:60:69:40:17:8b zone name UXNBPR101_1_SYM4757-FA07BA vsan 100 member pwwn SYM4757-FA07BA member fcalias UXNBPR101_1 exit zoneset name FABRIC_A_ZONESET vsan 100 zone name UXNBPR101_1_SYM4757-FA07BA exit zoneset activate name FABRIC_A_ZONESET vsan 100 Create zone on vsan 200. config t zone name UXNBPR101_0_SYM4757-FA10BA vsan 200 member pwwn SYM4757-FA10BA member fcalias UXNBPR101_0 exit zoneset name FABRIC_B_ZONESET vsan 200 zone name UXNBPR101_0_SYMM4757-FA10BA exit zoneset activate name FABRIC_B_ZONESET vsan 200 SYSLOGBrocade Set the syslog server so that the switch will forward all error log entries (see errShow) to the syslogd specified by the IP address. FC_Switch_A:admin> syslogdIpAdd "10.140.131.27" Committing configuration...done. FC_Switch_A:admin> syslogdIpShow syslog.IP.address.1: 10.140.131.27 DEPLOYBelow is a guideline of activities to perform.
SNMP CONFIGBrocade Set snmpv1 as ECC 6.x only supports v1. Ensure all FCP agents hosts are entered. # snmpconfig --set snmpv1 SNMP community and trap recipient configuration: Community (rw): [private] Trap Recipient's IP address : [10.26.26.165] Trap recipient Severity level : (0..5) [4] Trap recipient Port : (0..65535) [162] Community (rw): [private] Trap Recipient's IP address : [10.26.26.166] Trap recipient Severity level : (0..5) [4] Trap recipient Port : (0..65535) [162] Community (rw): [private] Trap Recipient's IP address : [10.26.26.168] Trap recipient Severity level : (0..5) [4] Trap recipient Port : (0..65535) [162] Show snmpv1 configuration.
# snmpconfig --show snmpv1

SNMPv1 community and trap recipient configuration:
  Community 1: private (rw)
    Trap recipient: 10.26.26.165
    Trap port: 162
    Trap recipient Severity level: 4
  Community 2: private (rw)
    Trap recipient: 10.26.26.166
    Trap port: 162
    Trap recipient Severity level: 4
  Community 3: private (rw)
    Trap recipient: 10.26.26.168
    Trap port: 162
    Trap recipient Severity level: 4
See access control set if needed. # snmpconfig --show accessControl SNMP access list configuration: Entry 0: Access host subnet area 10.26.26.0 (rw) Entry 1: Access host subnet area 10.26.30.0 (rw) Check the MIBs are enabled. # snmpconfig --show mibCapability FE-MIB:YES SW-MIB: YES FA-MIB: YES FICON-MIB: YES HA-MIB: YES ... Check seclevel is 0 for ECC 6.x to work. # snmpconfig --show seclevel GET security level = 0, SET level = 0 SNMP GET Security Level: No security SNMP SET Security Level: No security Cisco Similar to Brocade, enable traps and configure recipents. # config terminal switch(config)# snmp-server enable traps switch(config)# snmp-server community eccadmin rw switch(config)# snmp-server host 10.26.26.165 trap version 2c eccadmin udp-port 162 switch(config)# snmp-server host 10.26.26.166 trap version 2c eccadmin udp-port 162 switch(config)# snmp-server host 10.26.26.168 trap version 2c eccadmin udp-port 162 # exit # show snmp community # show snmp host Host Port Version Level Type SecName 10.26.26.165 162 v2c noauth trap private 10.26.26.166 162 v2c noauth trap private 10.26.26.168 162 v2c noauth trap private CTP FAILOVERBrocade First check failover status is healthy. # ssh dcx1 PWC_SW01:admin> hashow Local CP (Slot 6, CP0): Active, Cold Recovered Remote CP (Slot 7, CP1): Standby, Healthy HA enabled, Heartbeat Up, HA State synchronized Fail over to CP1. PWC_SW01:admin> hafailover Local CP (Slot 6, CP0): Active, Cold Recovered Remote CP (Slot 7, CP1): Standby, Healthy HA enabled, Heartbeat Up, HA State synchronized Warning: This command is being run on a redundant control processor(CP) system, and this operation will cause the active CP to reset. Therefore all existing telnet sessions are required to be restarted. Are you sure you want to fail over to the standby CP [y/n]? y Forcing Failover ... Reconnect to switch and confirm CP0 is primary, then fail back. PWC_SW01:admin> hashow Local CP (Slot 7, CP1): Active, Warm Recovered Remote CP (Slot 6, CP0): Standby, Healthy HA enabled, Heartbeat Up, HA State synchronized PWC_SW01:admin> hafailover Local CP (Slot 7, CP1): Active, Warm Recovered Remote CP (Slot 6, CP0): Standby, Healthy HA enabled, Heartbeat Up, HA State synchronized Warning: This command is being run on a redundant control processor(CP) system, and this operation will cause the active CP to reset. Therefore all existing telnet sessions are required to be restarted. Are you sure you want to fail over to the standby CP [y/n]? y Forcing Failover ... Reconnect to switch and confirm CP0 is primary again and in sync. PWC_SW01:admin> hashow Local CP (Slot 6, CP0): Active, Warm Recovered Remote CP (Slot 7, CP1): Standby, Healthy HA enabled, Heartbeat Up, HA State not in sync PWC_SW01:admin> hashow Local CP (Slot 6, CP0): Active, Warm Recovered Remote CP (Slot 7, CP1): Standby, Healthy HA enabled, Heartbeat Up, HA State synchronized McData
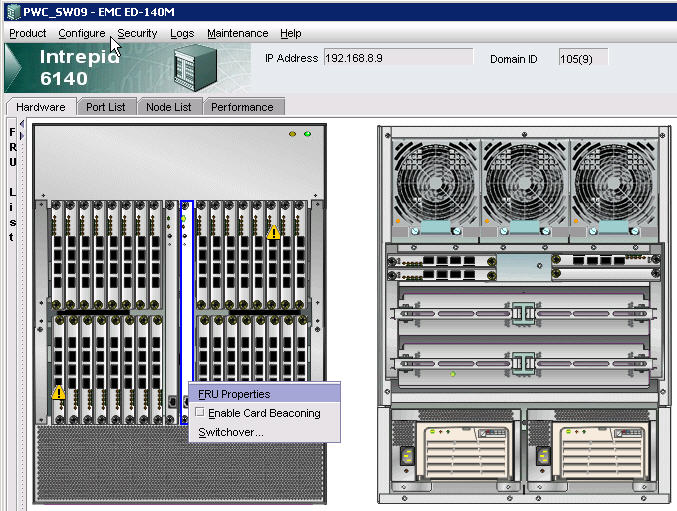
SWITCH LOGSMcData See below for how to gather Switch Data Collection files and process them through the EMC Switch Analysis Tool (SWAT).
Brocade Collect Data from Brocade DCX Switch.
Run SWAT
NTPMcData First ensure the Windows CM servers are running NTP. Then open element manager, operating parameters, date/time and select sync options. Brocade # tstimezone --interactive # date "1124180009" # tsClockServer "10.26.12.62;10.26.65.22;10.26.106.228" |